
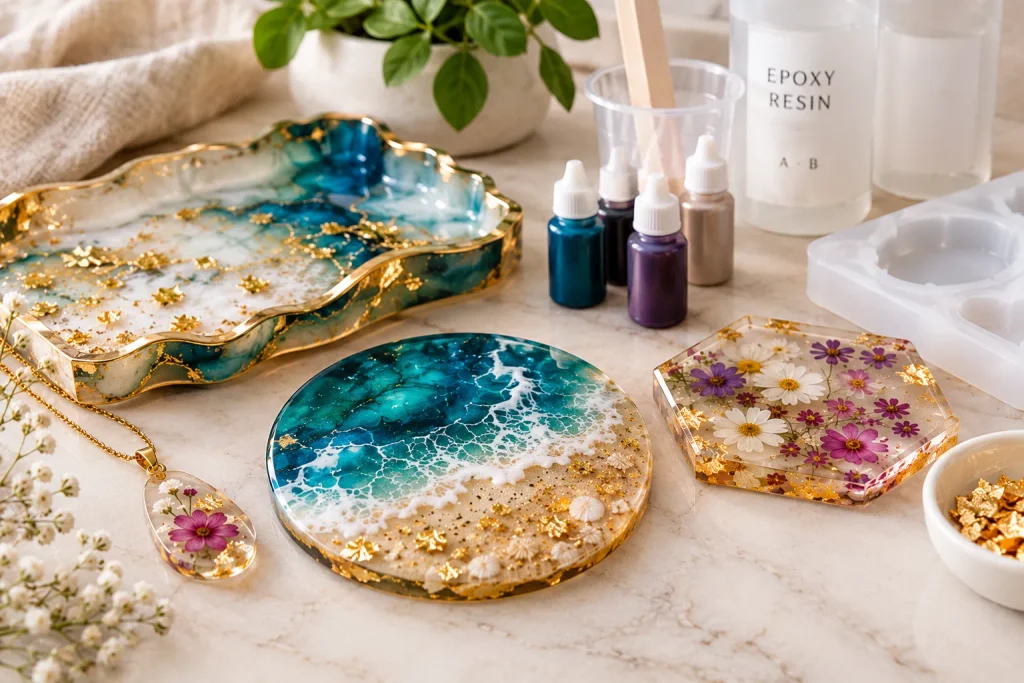
Resin art has become a popular way to turn simple materials into beautiful, glossy creations. From ocean-inspired coasters to elegant jewelry and decorative wall art, resin offers endless opportunities to express creativity. The best part? You do not need to be a professional artist to get started.
Whether you want to decorate your home, create personalized gifts, or explore a small handmade business, resin art is an exciting craft worth discovering. With a few essential supplies, some patience, and a little imagination, you can create pieces that feel personal and unique.
In this guide, we will explore what resin art is, the most popular types, the materials you need, and how to make your first resin project at home.
What Is Resin Art?
Resin art is a creative technique that uses liquid resin, typically an epoxy resin system, to produce hard, glossy, and often transparent designs. When the resin and its required hardener are mixed correctly, a chemical reaction causes the material to cure into a solid finish.
Artists can add pigments, metallic powders, dried flowers, glitter, and other decorative elements to create different effects. Once cured, resin can have a glass-like appearance that makes colors and textures stand out.
One reason people love resin art is its versatility. You can create small accessories, decorative trays, jewelry, coasters, keychains, and large statement pieces. Every project offers an opportunity to experiment with colors, shapes, and materials.
Why Is Resin Art So Popular?
Resin art combines creativity with practical uses, making it appealing to beginners, experienced crafters, and handmade product sellers.
1. Unique and personalized designs
Unlike mass-produced decorations, handmade resin pieces can be customized with favorite colors, initials, flowers, or meaningful keepsakes.
2. Beautiful home décor
Resin trays, coasters, wall art, and decorative objects can complement modern, minimalist, rustic, or luxury interiors.
3. Creative gift ideas
Personalized resin gifts are thoughtful choices for birthdays, weddings, anniversaries, and other special occasions.
4. Opportunities for a small business
With practice and careful costing, resin crafts can become a product line for an online shop. Jewelry, keychains, and small décor items are possible starting points, although profitability depends on material costs, production time, demand, and marketing.
Popular Types of Resin Art
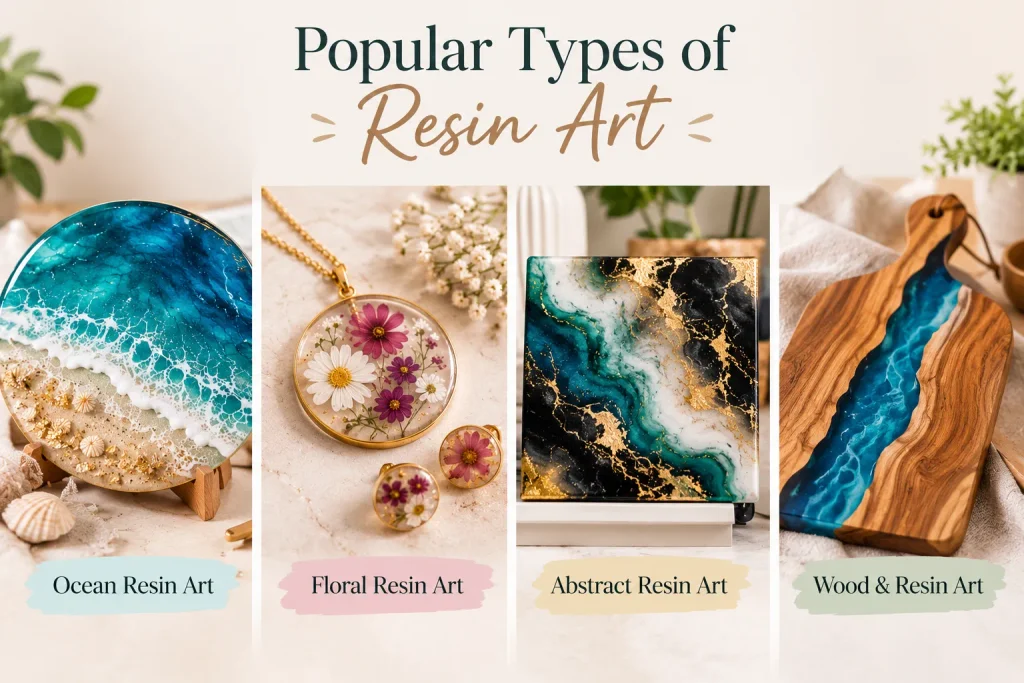
There is no single way to work with resin. Here are four popular styles to explore.
1. Ocean Resin Art
Ocean resin art recreates the appearance of waves, beaches, and turquoise water. Artists often combine blue, teal, white, and sandy beige pigments to create a coastal effect.
This technique is popular for coasters, serving trays, decorative boards, and wall art. If you enjoy beach-inspired décor, ocean resin art is a great style to experiment with.
2. Floral Resin Art
Floral resin art incorporates dried flowers, petals, and other botanical elements into decorative pieces. The flowers create delicate patterns and preserve their appearance within the finished design.
Common projects include pendants, bookmarks, paperweights, and decorative ornaments. Always use properly dried flowers and follow the resin manufacturer’s guidance for embedding organic materials.
3. Abstract Resin Art
Abstract resin art focuses on color, movement, and texture rather than recognizable objects. Metallic gold, black, white, emerald green, and soft neutral shades can create dramatic or sophisticated designs.
This style works especially well for decorative panels, art pieces, and contemporary home accessories.
4. Wood and Resin Art
Wood and resin art combines natural wood grain with colored or transparent resin. Some artists create river-inspired patterns that resemble flowing water through a wooden surface.
Popular projects include serving boards, decorative tables, and statement home décor. Larger projects usually require additional equipment, careful planning, and more experience.
Essential Supplies for Resin Art
Before starting your first project, gather the right materials.
- Epoxy resin and hardener: Choose a system designed for your intended project.
- Silicone molds: Useful for making coasters, pendants, keychains, and small decorative items.
- Pigments and colorants: Select colorants compatible with your resin.
- Mixing cups and stir sticks: Use clean, suitable tools and accurate measurements.
- Protective gloves and eye protection: Follow the product’s safety instructions.
- A level work surface: This helps your resin cure evenly.
- Decorative additions: Dried flowers, metallic flakes, or other compatible inclusions can personalize your designs.
Work in a well-ventilated area, use the personal protective equipment specified by the manufacturer, and follow the resin’s safety data sheet. Some resin systems require more protection than ordinary household crafting supplies. Keep uncured resin away from skin, children, and pets.
How to Make Resin Art at Home: A Step-by-Step Guide
A small coaster is a useful first project because it allows you to learn basic mixing and pouring techniques without committing to a large design.
Step 1: Prepare Your Workspace
Cover your work surface and place your silicone mold on a level, stable area. Gather all materials before opening the resin containers.
Step 2: Measure and Mix the Resin
Read the product instructions carefully. Measure the resin and hardener using the specified ratio, then mix slowly for the recommended time. Incorrect measurements or incomplete mixing can prevent proper curing.
Step 3: Add Color
Divide a small amount of mixed resin into separate cups if you want multiple colors. Add compatible pigments gradually and mix thoroughly.
For an ocean-inspired coaster, try turquoise, deep blue, and white.
Step 4: Pour Your Design
Pour the colored resin into the mold in layers or sections to create your desired pattern. Use a suitable mixing stick to guide the colors and create gentle movement.
Step 5: Add Decorative Details
If your design calls for metallic flakes or other inclusions, add them according to the resin manufacturer’s instructions. Avoid overcrowding the mold.
Step 6: Allow the Resin to Cure
Cover the project to protect it from dust and leave it undisturbed for the full curing time specified by the manufacturer. Many products require around 24–72 hours or longer, depending on the formulation and conditions.
Step 7: Demold and Inspect
Once fully cured, carefully remove the coaster from the mold. Inspect the edges and surface, and follow the manufacturer’s recommendations if any finishing is necessary.
Your first project does not need to be perfect. Each attempt will help you understand how colors blend, how resin flows, and how different designs behave.
Tips for Better Resin Art Results
A few simple habits can make a noticeable difference.
- Measure accurately: Follow the specified resin-to-hardener ratio.
- Choose compatible pigments: Too much or unsuitable colorant can interfere with curing.
- Control dust: Cover your project while it cures.
- Manage temperature: Stay within the manufacturer’s recommended working and curing range.
- Be patient: Do not remove the piece from its mold before it is ready.
- Prioritize safety: Never use an open flame to remove bubbles, and do not use a heat gun unless the product instructions permit it and you understand the associated risks.
Remember that practice matters more than expensive equipment. Start with small projects, learn from mistakes, and gradually experiment with more advanced techniques.
Can You Turn Resin Art Into a Small Business?
Yes, resin art can be a starting point for a handmade business. Begin by choosing a clear product category, such as resin jewelry, personalized gifts, or decorative home accessories.
Create a small collection, photograph each piece in natural-looking light, and calculate material costs, packaging, labor, shipping, and platform fees before setting prices. You can promote your work through social media or an online store.
Quality and consistency are especially important. Clearly describe your products, provide accurate care instructions, and avoid making unsupported claims about food safety, heat resistance, or durability.
Final Thoughts
Resin art is more than a craft; it is a way to transform ideas into objects that reflect your personal style. From delicate floral jewelry to ocean-inspired coasters, the possibilities are limited mainly by your imagination, materials, and skills.
Start with a simple project, follow safety instructions, and give yourself time to learn. As your confidence grows, you can explore new techniques, develop your own designs, and even build a collection of handmade products.
Ready to get creative? Gather your supplies, choose your favorite colors, and start your first resin art project today.
Frequently Asked Questions
Is resin art suitable for beginners?
Yes. Small projects such as coasters and keychains are useful for learning basic resin techniques, provided you follow the product’s safety and mixing instructions.
How long does resin art take to dry?
Many epoxy resin products become touch-dry within a day, but full curing can take several days or longer. Always follow the manufacturer’s stated curing time.
What can you make with resin?
Common projects include jewelry, coasters, trays, keychains, bookmarks, decorative panels, and certain furniture designs.
Can resin art become a business?
Yes, but success depends on product quality, original designs, pricing, marketing, and demand. Start small and validate your products before investing heavily.